
How to Design a Challenge Coin That Strikes Cleanly
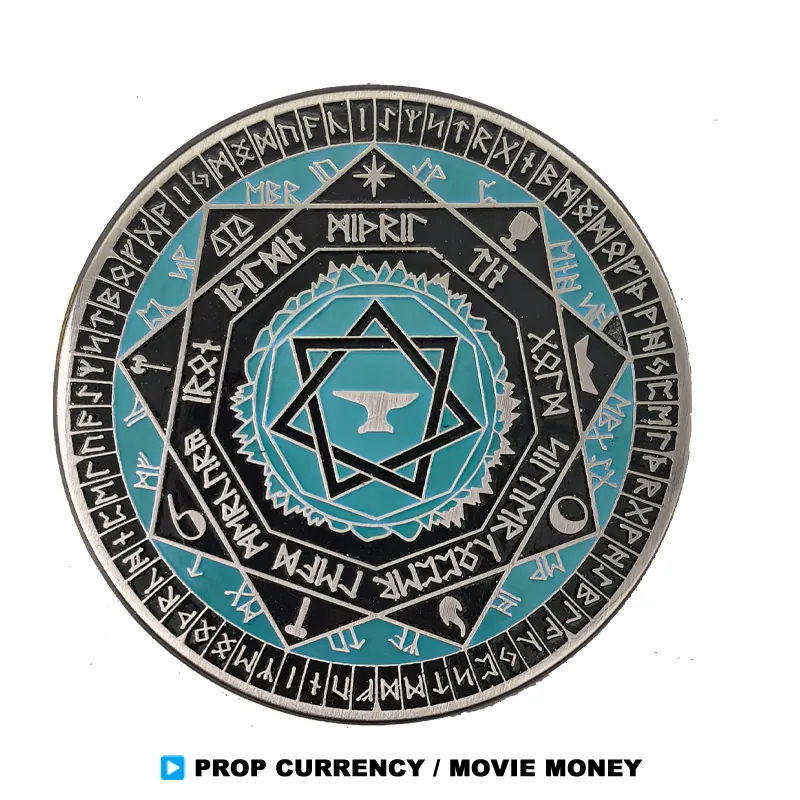
To design a challenge coin that strikes cleanly, treat the artwork as a manufacturing document rather than a poster. The die does not care how the layout looked on your monitor. It cares about line widths, relief depth, colour separations and how much metal has to flow into each detail. Get those right and the coin reads sharp at arm's length, which is the standard the whole tradition was built on: challenge coins get passed hand to hand, inspected up close, then dropped on a table to make a point.
Two sides, two different jobs
Most first drafts cram everything onto both faces. Don't. The front carries identity: the crest, emblem, sculpted figure, whatever a person recognises across a room. The back carries information: unit name, motto, dates, event name, a line of text, room for a serial if you number them. Make both sides emblems and both sides end up crowded and unreadable.
So decide which side has to work at a glance and which side has to be read. Then give the readable side more room, bigger type and fewer decorative flourishes. Most coins land somewhere between 38 mm and 45 mm across. Ask your supplier how a specific detail holds up at your chosen diameter before you fall in love with the composition.
Text that survives the die
Text fails on coins far more often than artwork does. Three reasons: letters too small, strokes too thin, or words sitting too close to the rim where the die edge wipes detail away.
- Keep cap height above roughly 1.2 mm. Smaller than that and serifs, counters and the gaps inside letters close up.
- Pick a bold sans serif for mottos. Script fonts and hairline serifs look elegant on screen and turn to porridge in metal.
- Space letters a touch wider than you would in print. The metal walls between letters need room to exist.
- Hold text at least 2 mm inside the rim, measured to the outside of the letters.
- Print the artwork at 100% and tape it to a wall. If you cannot read the motto from about a metre away, it is too small.
Curved text along top and bottom arcs is standard on coins and worth using. Keep the arc generous though. Tight arcs squeeze the letters at the sides, and your die cutter will thin them unevenly to make the curve fit.
Line thickness is where clean strikes are won
Enamel needs metal to hold it. On hard enamel, each colour sits in its own recess with a metal wall around it, and each colour is fired separately, which is why the surface can be polished flat without colours bleeding into each other. Thin those walls below roughly 0.25 mm and you are asking a toolmaker to cut something that may not survive the strike, let alone a long run.
Soft enamel is more forgiving on colour. The raised metal lines still define the design, though, and hairlines under about 0.2 mm are a gamble. The gamble usually loses on the last third of the order, after the die has worn.
Antique finishes punish thin lines hardest. A dark wash sits in the recessed lines and swallows anything delicate, so a pattern you drew at 0.15 mm comes out looking like a smudge.
Blunt version: design at 40 mm the way you would design a road sign, not a business card.
How many enamel colours is too many?
For hard enamel, every colour is a separate fill and a separate trip through the oven. Colour count drives cost and lead time directly. Eight is a sensible ceiling for most designs. Five or six is better. A coin with fourteen colours is usually a design that has not been edited yet.
Send Pantone Solid Coated references, not RGB values or a screenshot of a swatch. Solid Coated is the right book for metalwork because the swatch you pick becomes the pigment mixing reference. Expect small shifts anyway. Enamel is pigment and glass, not ink on paper, and the plating underneath will warm or cool the final colour.
What enamel cannot do: gradients. If the artwork needs a soft fade, a photographic image or forty shades of sky, you are looking at offset printing or UV print under epoxy instead. Say that on day one, because the file setup changes completely.
2D or 3D relief?
Die striking presses a design into a metal blank. Die casting pours molten alloy into a mould, which is closer to stamping and pressing in reverse. Striking gives crisper lettering and a denser feel in the hand. Casting gives you deeper sculpture and shapes a stamp cannot reach. The full trade-off is covered in die struck vs die cast.
| Relief choice | What it looks like | Best for | Watch out for |
|---|---|---|---|
| Flat 2D, die struck | One plane, colours separated by thin metal walls | Crests, mottos, unit insignia, tighter budgets | Fine serifs and thin walls disappear |
| 2D with raised or recessed detail | Hero emblem lifts off the field, background stays flat | A strong central symbol with text around it | Colour fill on tight raised corners goes uneven |
| Full 3D cast relief | Sculpted figures, deep contours, often uncoloured | Animals, vehicles, figures, ceremonial pieces | More tooling cost and longer artwork revisions |
Plating, antique finishes and the edge
Plating options we work with run across gold, nickel, copper, bronze, antique and satin finishes. Gold reads formal. Nickel reads modern and crisp. Antique bronze reads military and hides scuffs on a coin that gets carried for years.
Two rules on antique. It needs recessed detail to hold the wash, so big flat fields come out patchy. And it lowers the contrast between metal and enamel, which means you bump your type weight up a step to compensate.
The edge is the cheapest way to make a coin feel expensive. Plain, reeded, rope, diamond-cut or a stepped rim: many factories offer all of these and the price difference is usually modest. A reeded edge gives grip and a machined feel. Diamond-cut catches light and photographs well. Numbered edges and laser-engraved serials are widely available too, so ask your supplier what they do in-house.
The file your factory actually wants
Vector only. Adobe Illustrator or CorelDRAW, fonts converted to outlines, one layer per colour, plus a separate layer for the cut line if the shape is not round. Label each layer with its Pantone reference so nobody has to guess. Raster images are fine as reference, never as production art.
Our technical notes ask for AI or CorelDRAW with Pantone Solid Coated for a simple reason: artwork goes straight to tooling, and a clean file can save a whole revision round. If all you have is a JPEG of a 30 year old crest, say so at the start. Redrawing takes a day. Guessing takes longer.
Also tell your supplier what the coin must not look like. "No gradients, motto stays in caps" is useful brief information, not nitpicking.
Proof, sample, then production
Three checkpoints, in order. A digital artwork proof confirms layout, spelling and Pantone numbers. A render or mould proof confirms the relief before metal gets cut. A physical sample confirms weight, plating, colour and how the enamel actually sits.
Sampling usually takes 3-8 days. Bulk production runs 7-15 days depending on the item, and reorders of an approved design skip the mould fee because the tooling stays on file, which we keep for 2 years. Approve in writing. A verbal "looks good" has cost more buyers more money than any other sentence in this trade.
Run this list before you sign off:
| Check | Why it matters |
|---|---|
| Spelling and punctuation | A misspelled motto is permanent, and the die is already cut |
| Pantone numbers on every colour | Stops the factory picking a nearby shade it prefers |
| Text at 100% scale, printed | Screen zoom lies about legibility |
| Thinnest line in the design | If it is under roughly 0.25 mm, thicken it now |
| Rim margin on text | Detail close to the edge gets clipped |
| Plating against enamel colours | Antique and dark colours can merge into one tone |
| Edge and any numbering | Not visible on a flat digital proof |
Starting an order with us
Design work is free, so the fastest route is to send us what you have. Our team replies within 8 hours and can produce an artwork proof for approval before anything gets cut. Sample turnaround is usually 3-8 days, and small custom runs are accepted whatever the order size, which suits club and unit orders.
Email order@ty-gifts.com or call and message +86 181 2281 1289 (phone and WhatsApp). You can also go through the contact page and tell us the coin size, quantity and deadline. Have a look at the custom challenge coins we make, including enamel and die struck builds, and read what drives challenge coin cost before you set a budget. Our production process runs in twelve steps from artwork to shipping, and we have been making metal crafts for over 40 years.
Frequently asked questions
How small can text be on a challenge coin?
Keep cap height above roughly 1.2 mm and choose a bold sans serif. Print the artwork at 100% and check it from about a metre away. If the motto is hard to read on paper at that distance, it will not survive the die. Curved text needs an even more generous arc so the letters do not get squeezed at the sides.
How many enamel colours should my challenge coin design use?
Eight is a practical ceiling, and five or six is better. On hard enamel each colour is filled and fired separately, so colour count affects both price and lead time. If your design needs gradients or photographic shading, enamel is the wrong process and printed options under epoxy are the better fit.
What file format should I send for challenge coin artwork?
Adobe Illustrator or CorelDRAW, with fonts converted to outlines, one layer per colour and a separate layer for the cut line. Mark each layer with its Pantone Solid Coated reference. Send a JPEG or screenshot only as reference, not as production art, because tooling needs vector paths.
How long does a challenge coin sample take?
Samples usually take 3-8 days, then bulk production runs 7-15 days depending on the item and the queue. Reorders of an approved design skip the mould fee because the tooling is kept on file for 2 years. Ask for the schedule in writing against your event date before you approve.